How to Make a Glitter Balloon Christmas Present
We're feeling EXTRA festive over here at the DIY Corner!
For your Christmas party décor this year, add some glitz and glam with this mini glitter balloon present! Take a different approach to this balloon design by using clear latex balloons and adding in chunky glitter. Wrap everything up with a dainty balloon bow. This DIY is simple, yet it will make such a statement piece. Use this as party décor or give it to someone who has brought a little sparkle into your life!


Supplies you’ll need:
- 5” clear latex balloons – 12 total
- 160Q latex balloon – 2 total, color of your choice
- Tubes of glitter – 2 total (these can be found at your local craft store.)
- Balloon hand pump
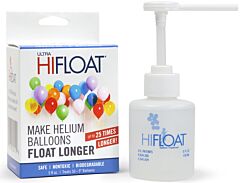
- Hi-Float
- Ribbon or fishing line


Step 1: First, let’s start with eight balloons. (a) Pump Hi-Float into eight clear latex balloons. The Hi-float will act as a glue and help the glitter stick on the wall. (b) Pump in air three times. (c) Don’t tie just yet! Twist balloon so no air comes out.

Step 2: It’s GLITTER time! (a) Take the opening of the balloon and stretch it over the glitter tube. (b) Carefully pour and coat the walls with the glitter. Shake or turn balloon so enough glitter covers the entire balloon wall. (c) Tie balloon tightly to close it up.

Step 3: Creating the quads! (a) Tie two balloons together. (b) Tie another set of two balloons together. (c) Twist the two sets together creating a quad. Create two quads total and lay them flat.

Step 4: The Mini Quad. You should now have four clear latex balloons left over. (a) Create one more quad, EXCEPT this time make sure to only pump in air two times for each balloon. This quad should be smaller than the first two quads you’ve created so far. (b) Follow step 2 to add in glitter. (c) Lay the quad down flat. After creating this one, you should now have three quads total.

Step 5: Assembling the Present. (a) Sandwich the smaller quad in between the two bigger quads like this below! (b) Use a ribbon or fishing line and tie all three quads tightly together. Cut off any remaining ribbon or fishing line that’s hanging out.

Step 6: The Mini Bow. (a) Next up, pump air into the two 160Q balloons. Don’t pump all the way full, leave about a 3-inch tail at the end. (b) Fold the top down about 2 inches and twist, creating a small loop. Repeat for the other 160Q balloon. (c) Now twist the two necks of the loops together.

Step 7: Almost Finished! It should now start to look more like a bow. (a) Take one leg and twist a small bubble at the top near the loops. (b) Hold the two legs of the balloon together and twist the bubble locking it in between the two loops.

Step 8: Time to wrap things up! (a) Place your bow on top of the present and bring the legs down. (b) Turn your present upside down with the bow facing flat down with the present. (c) Twist a bubble on each leg, then overlap the neck of those bubbles together. (d) Now bring the legs up, flipping the present over to the bow side. (e) Take the tail end of the balloons and tie tightly together, hiding it underneath the bow. Cut any extra tail off.

YOU DID IT!! That wasn’t too bad, right?! You should now have yourself a GLITTER Christmas present just in time to decorate for your Christmas event. Enjoy the party!

Watch a quick tutorial here:
Do you love glitter just as much as we do?! We hope you guys enjoyed this glitz and glam DIY and try it for yourself. Have a safe and sparkly-filled Christmas!